
Five steps to master thermal photography
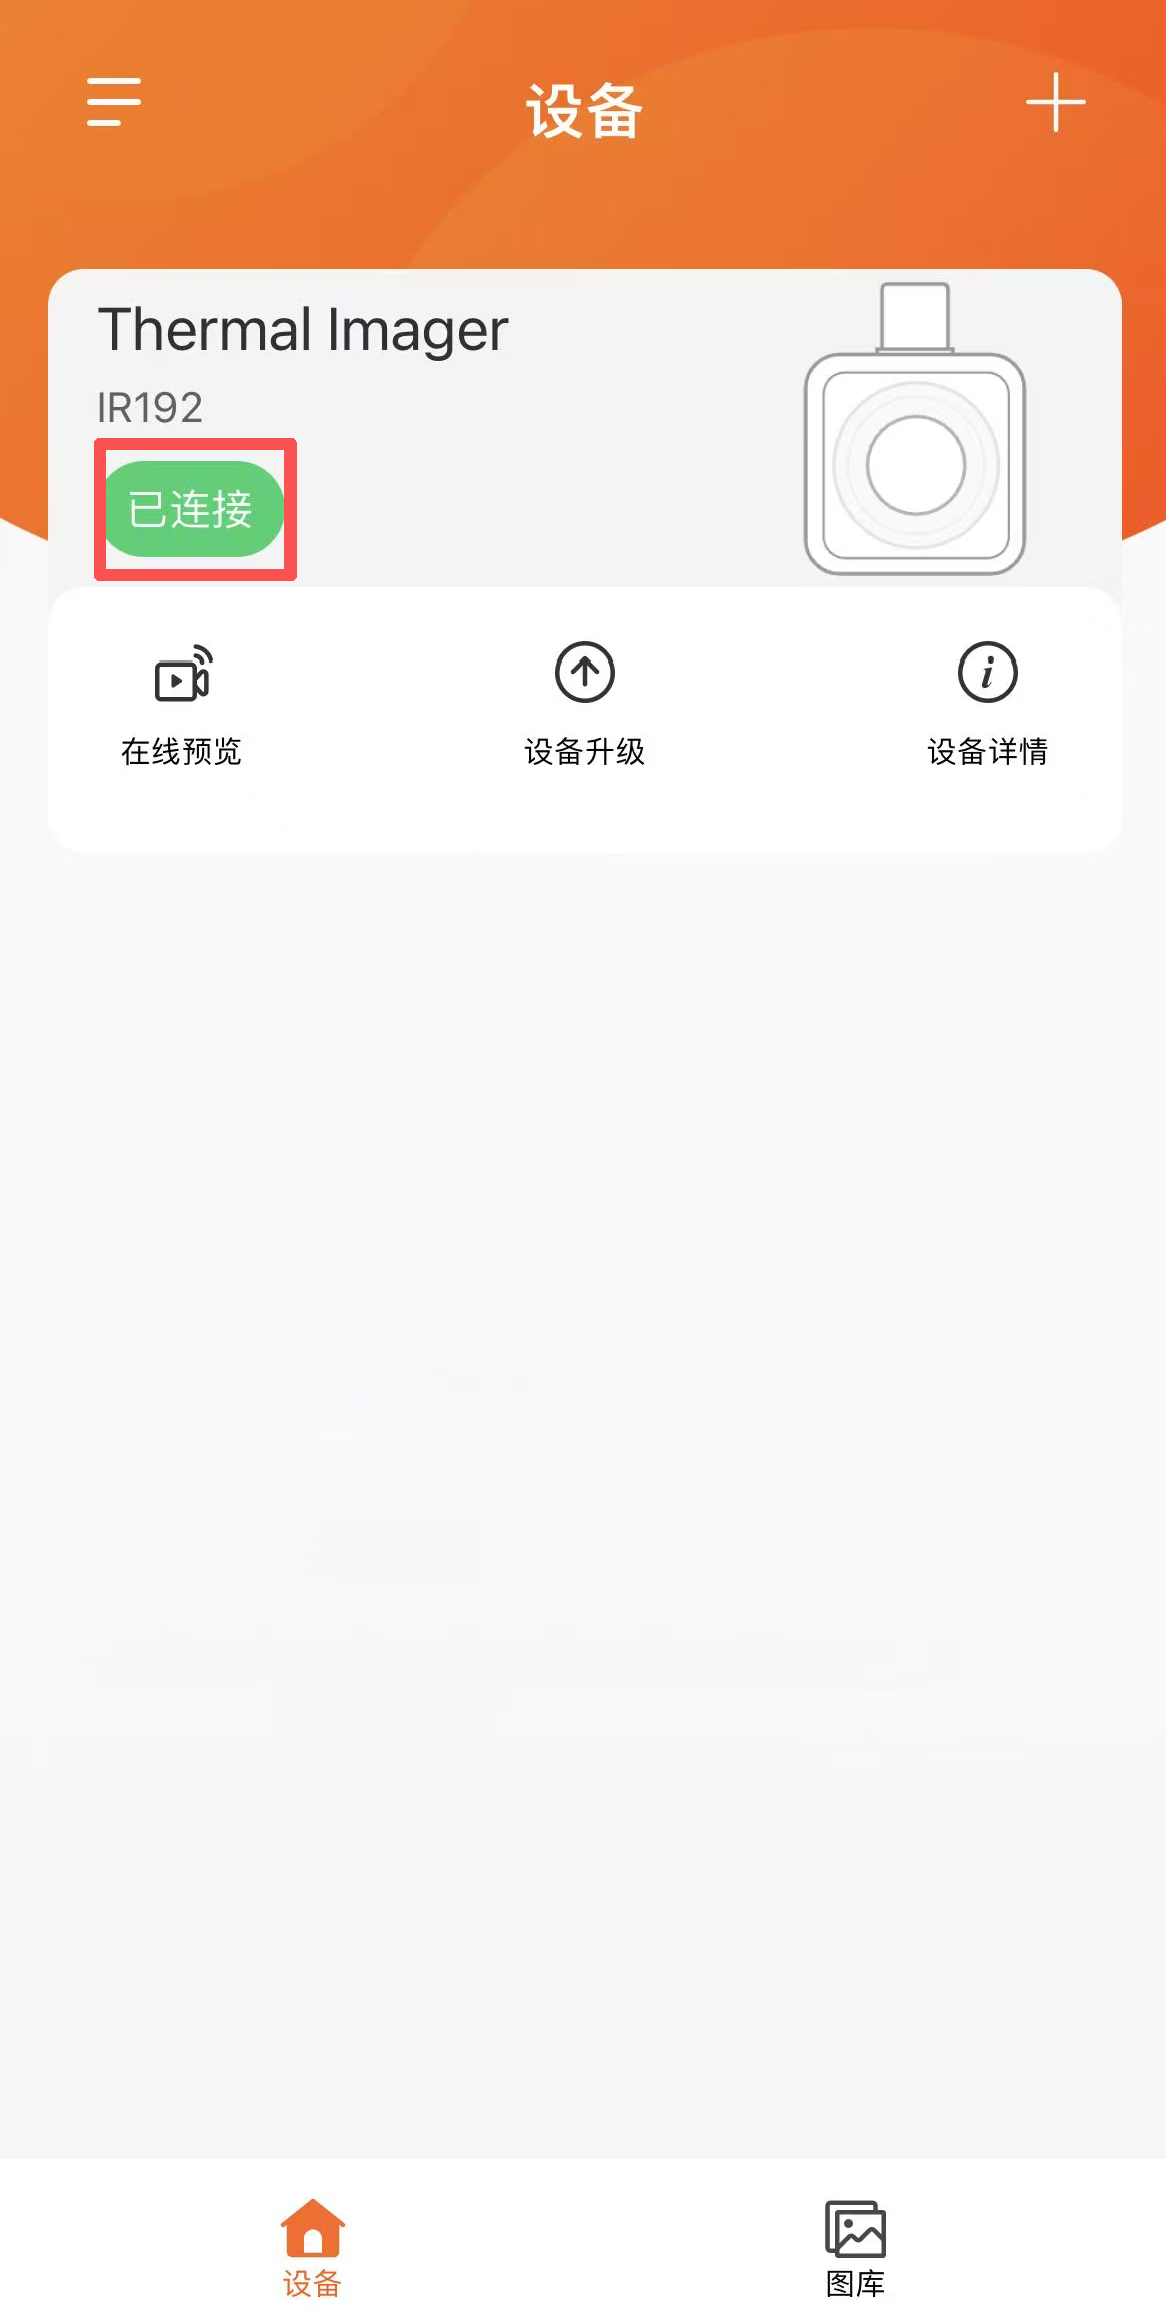
Step 1: Connect your device and open the app
Insert the thermal camera into the phone's Type-C port (some Android phones require OTG enabled in system settings first), then open the "THG Start" app and confirm that "Connected" appears in the upper left corner.
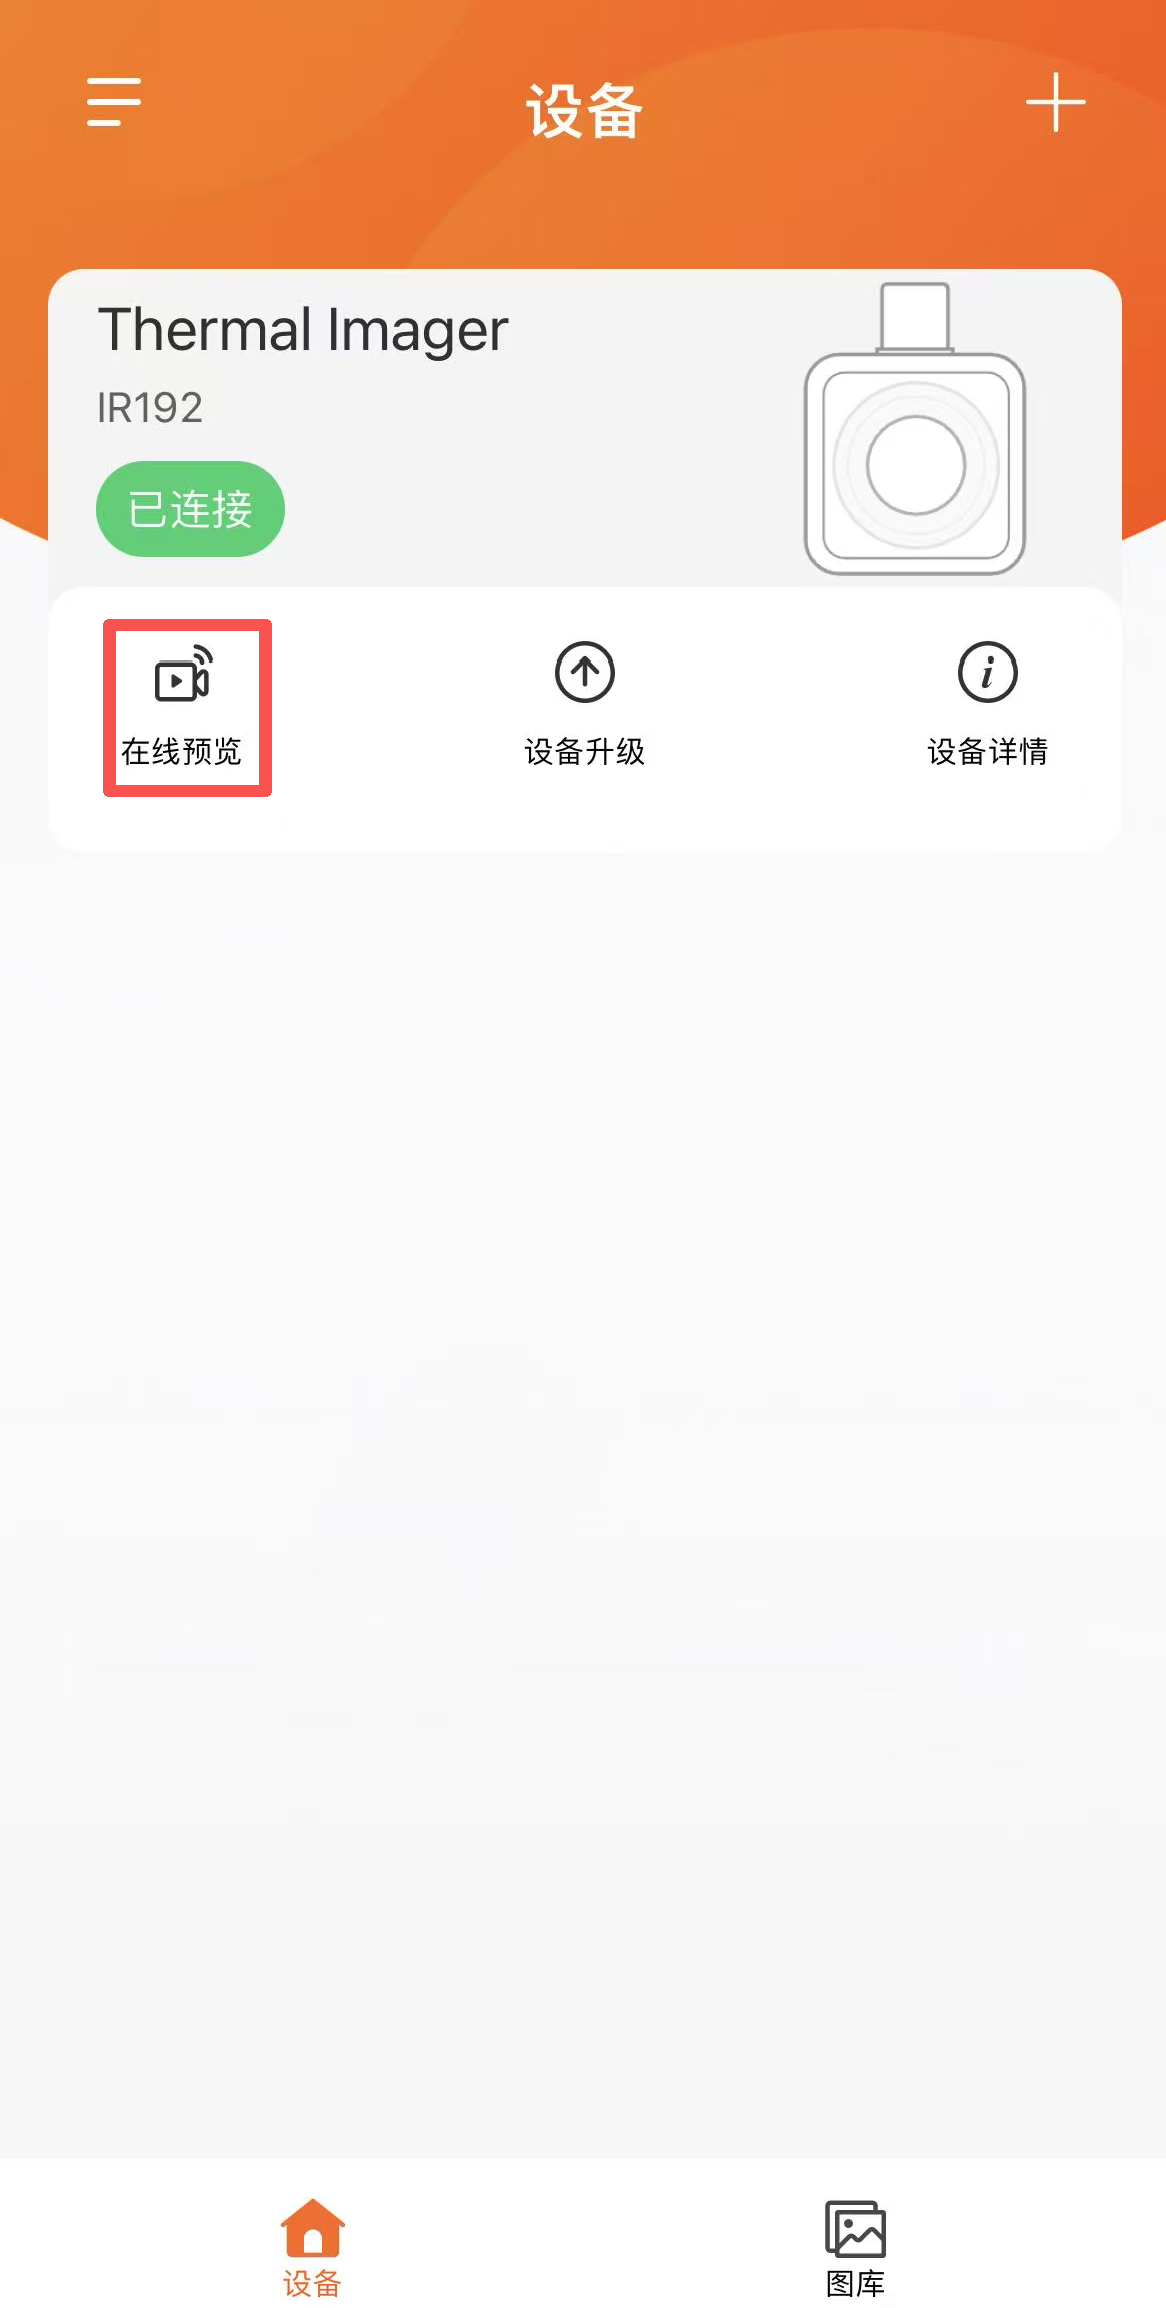
Step 2: Enter the online preview interface
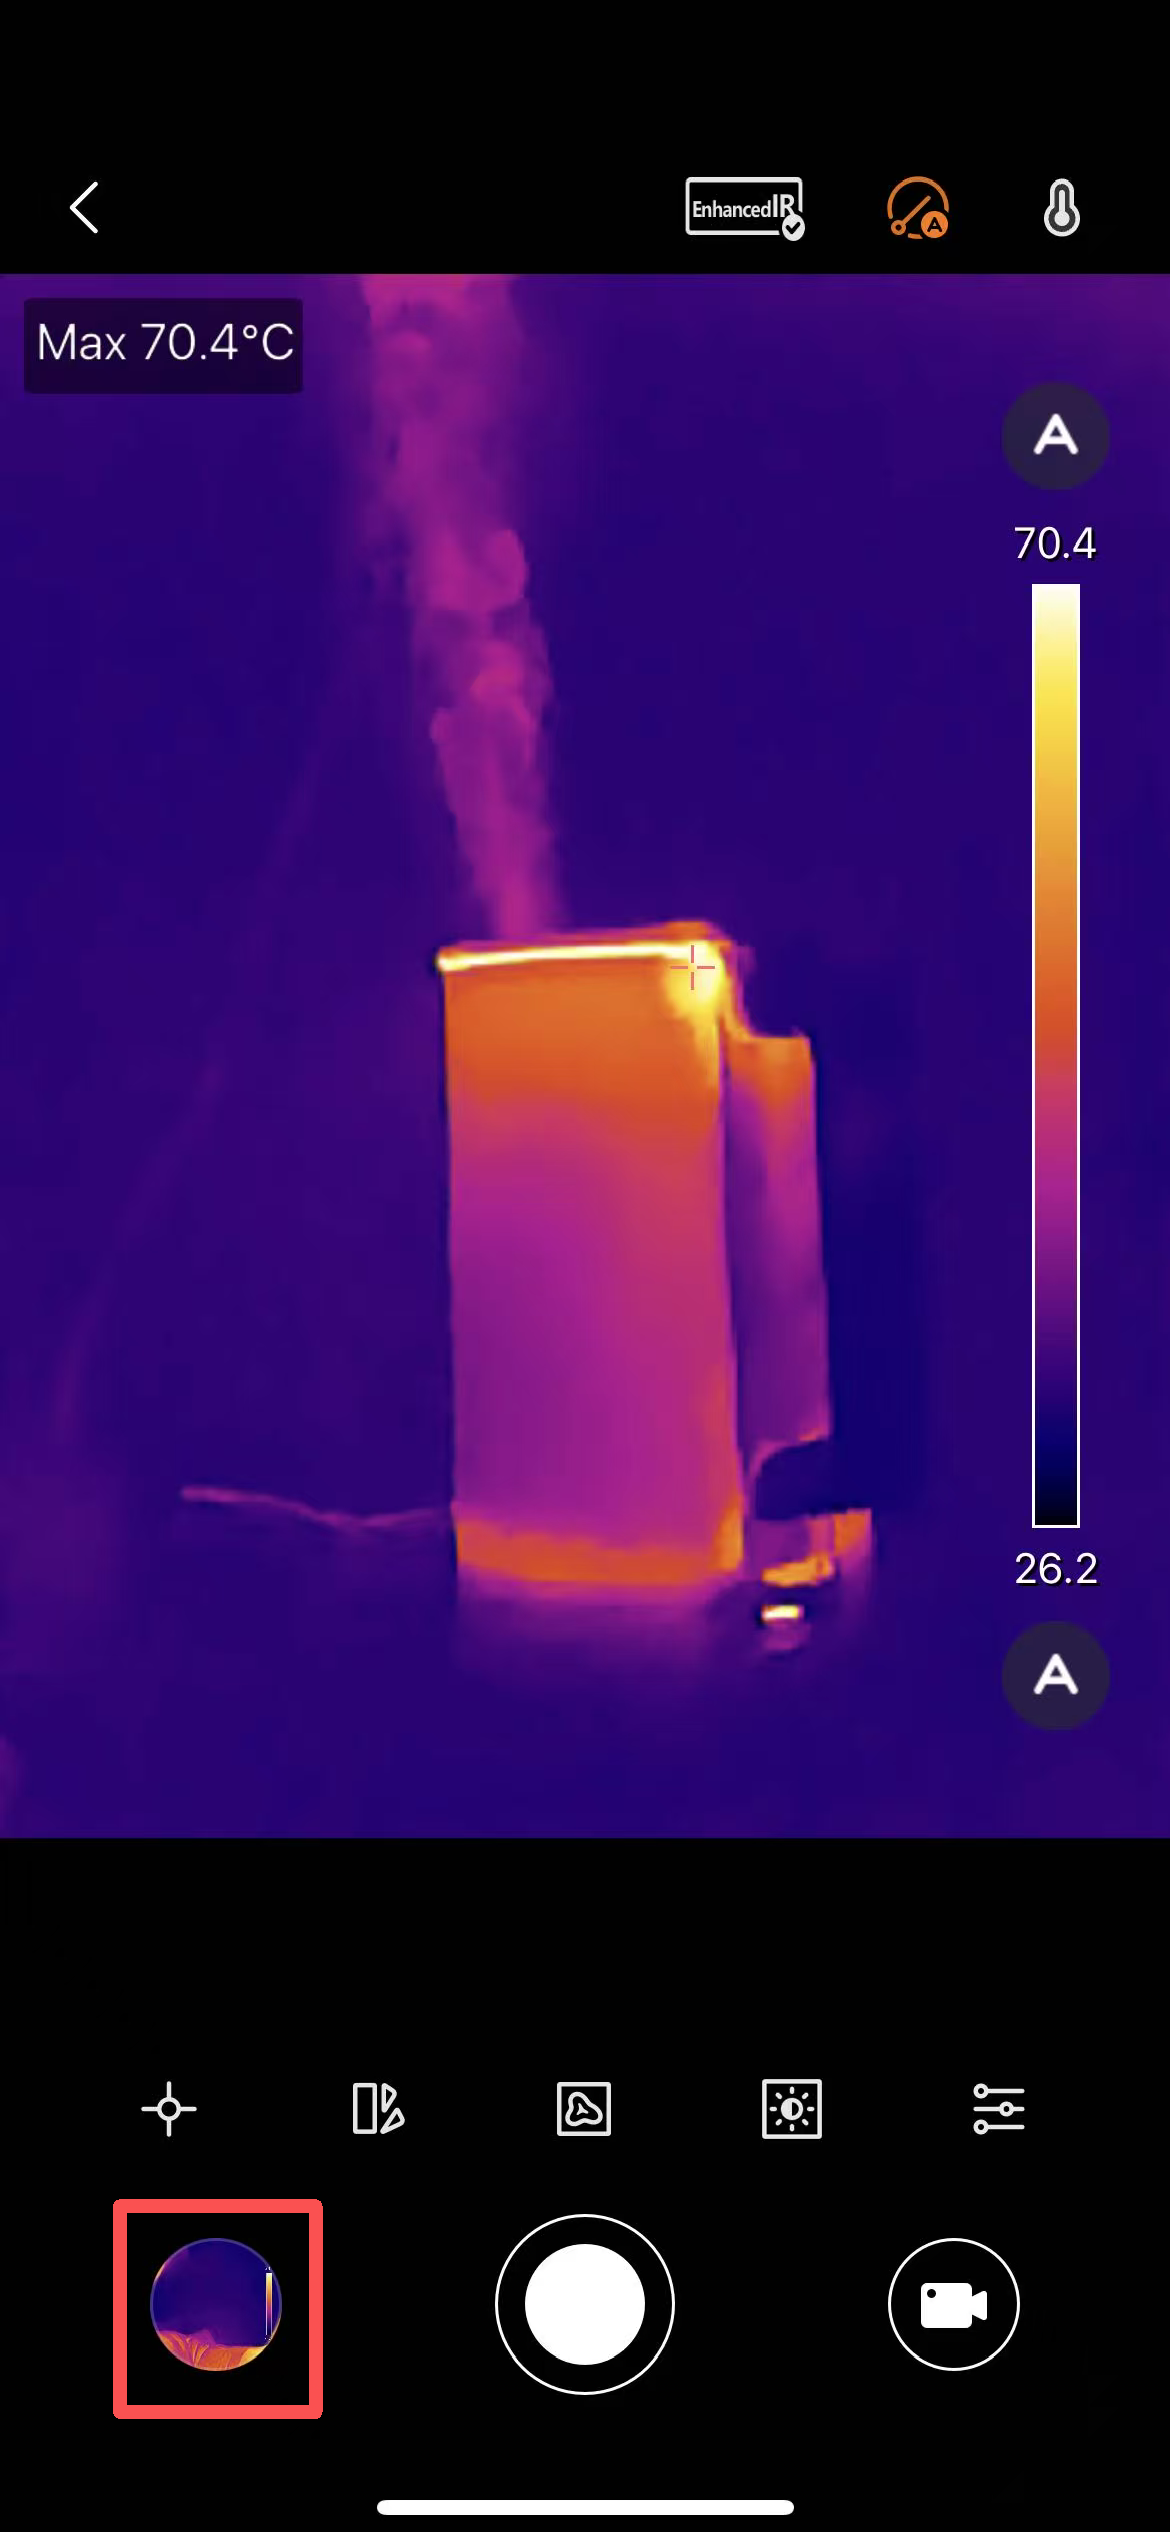
On the main interface, click "Online Preview" to enter the real-time imaging screen.
Adjust the screen (optional)
Click EnhancedIR to enhance image clarity.
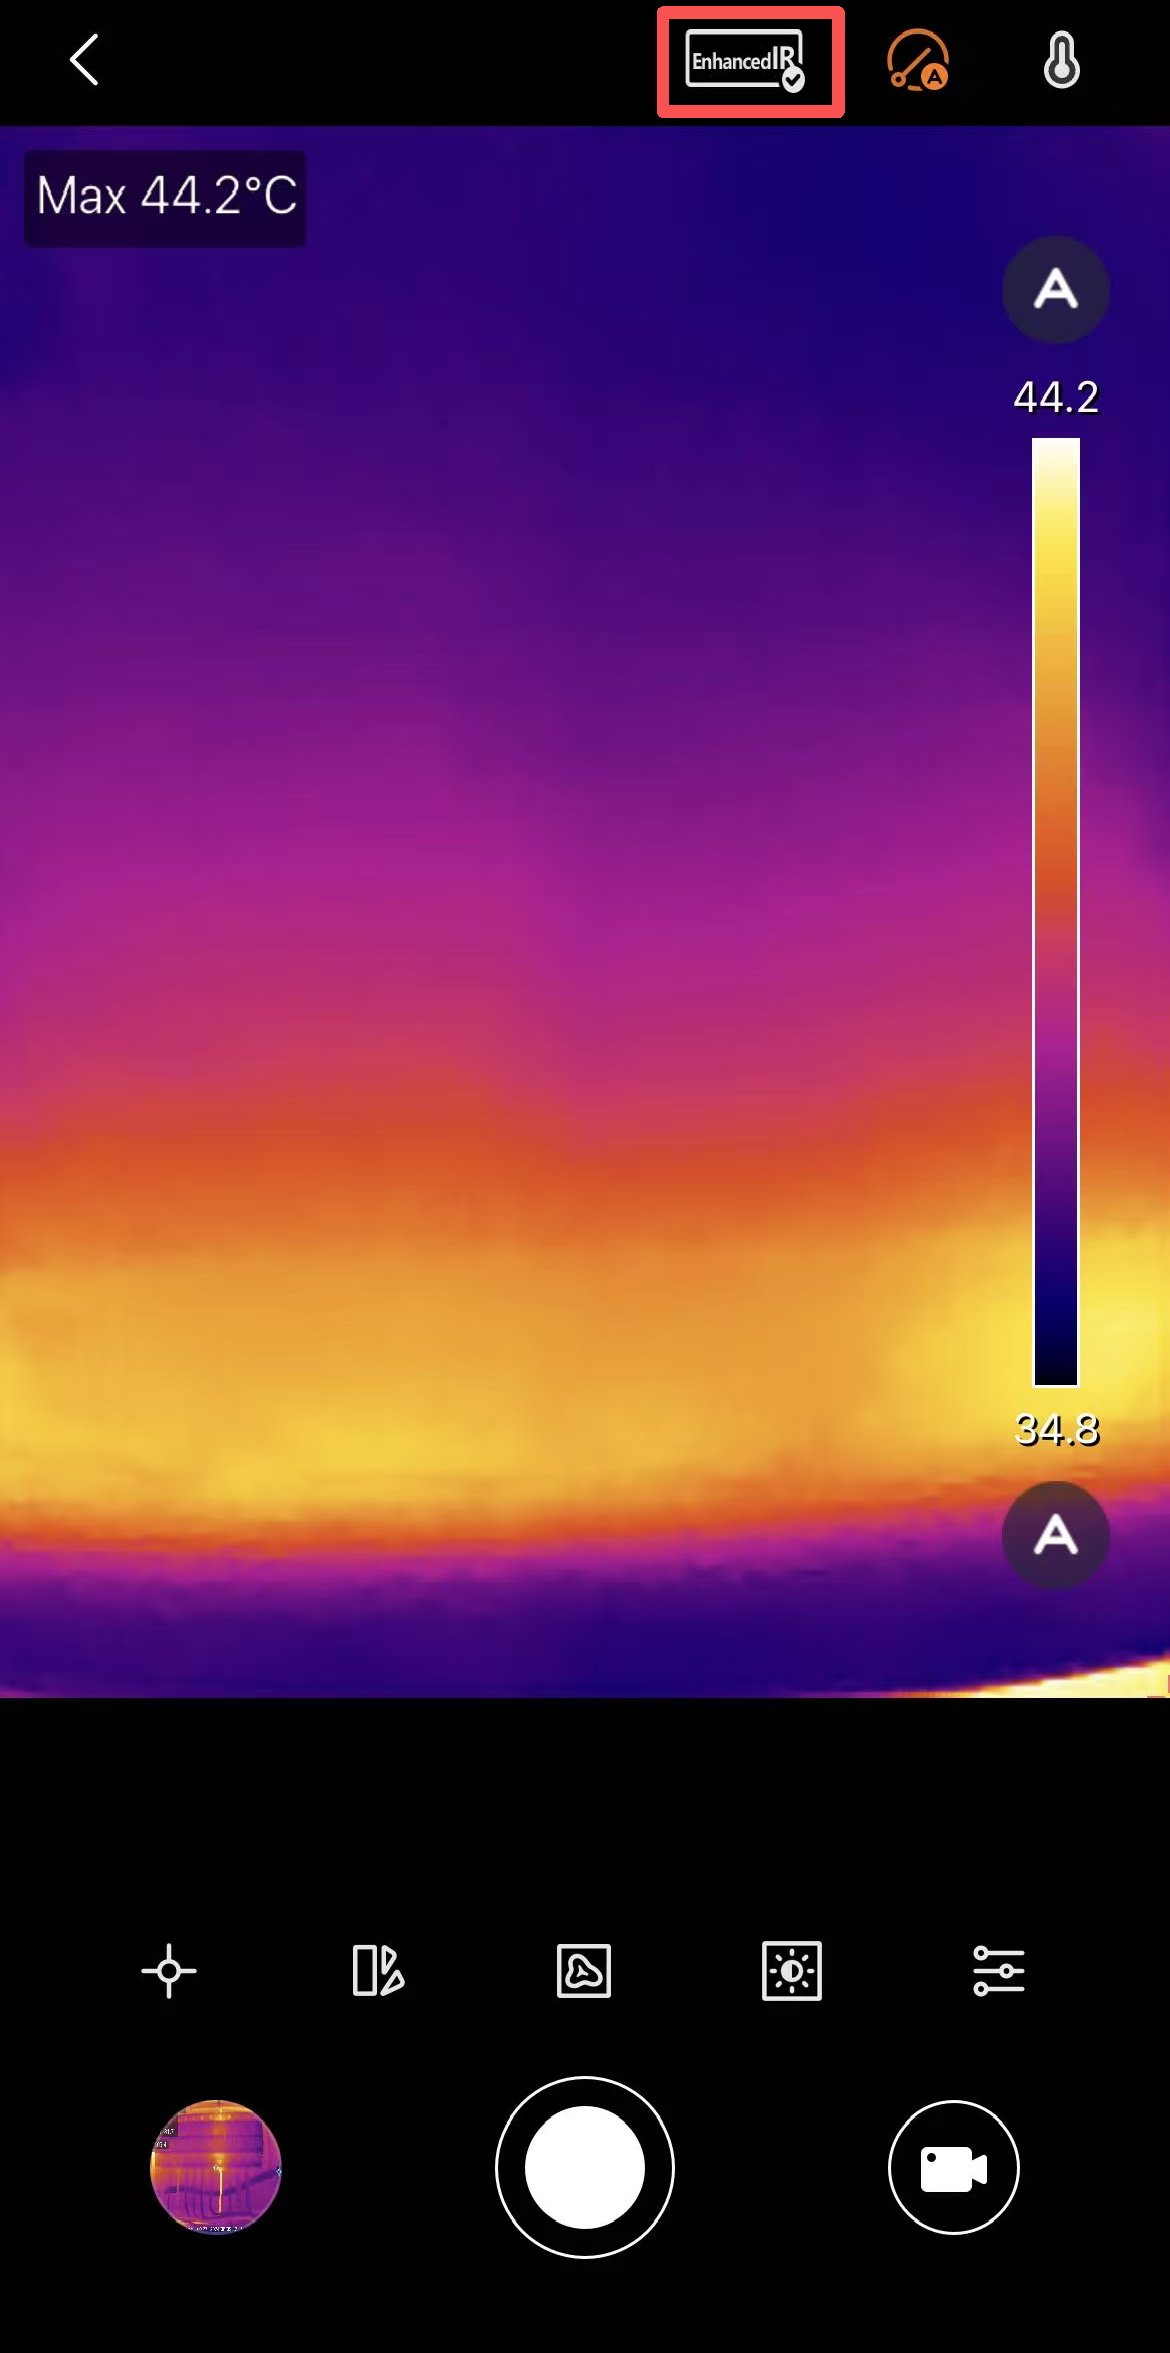
Select pseudocolor modes as needed, adjust temperature ranges, or image parameters (brightness, contrast, etc.).
Step 3: Perform the photo
At the bottom center of the preview interface, tap the photo icon (circular shutter button) to manually capture and save the current thermal image.

Note: To switch to video mode, first click the square icon at the bottom right to switch, then click the red recording button.
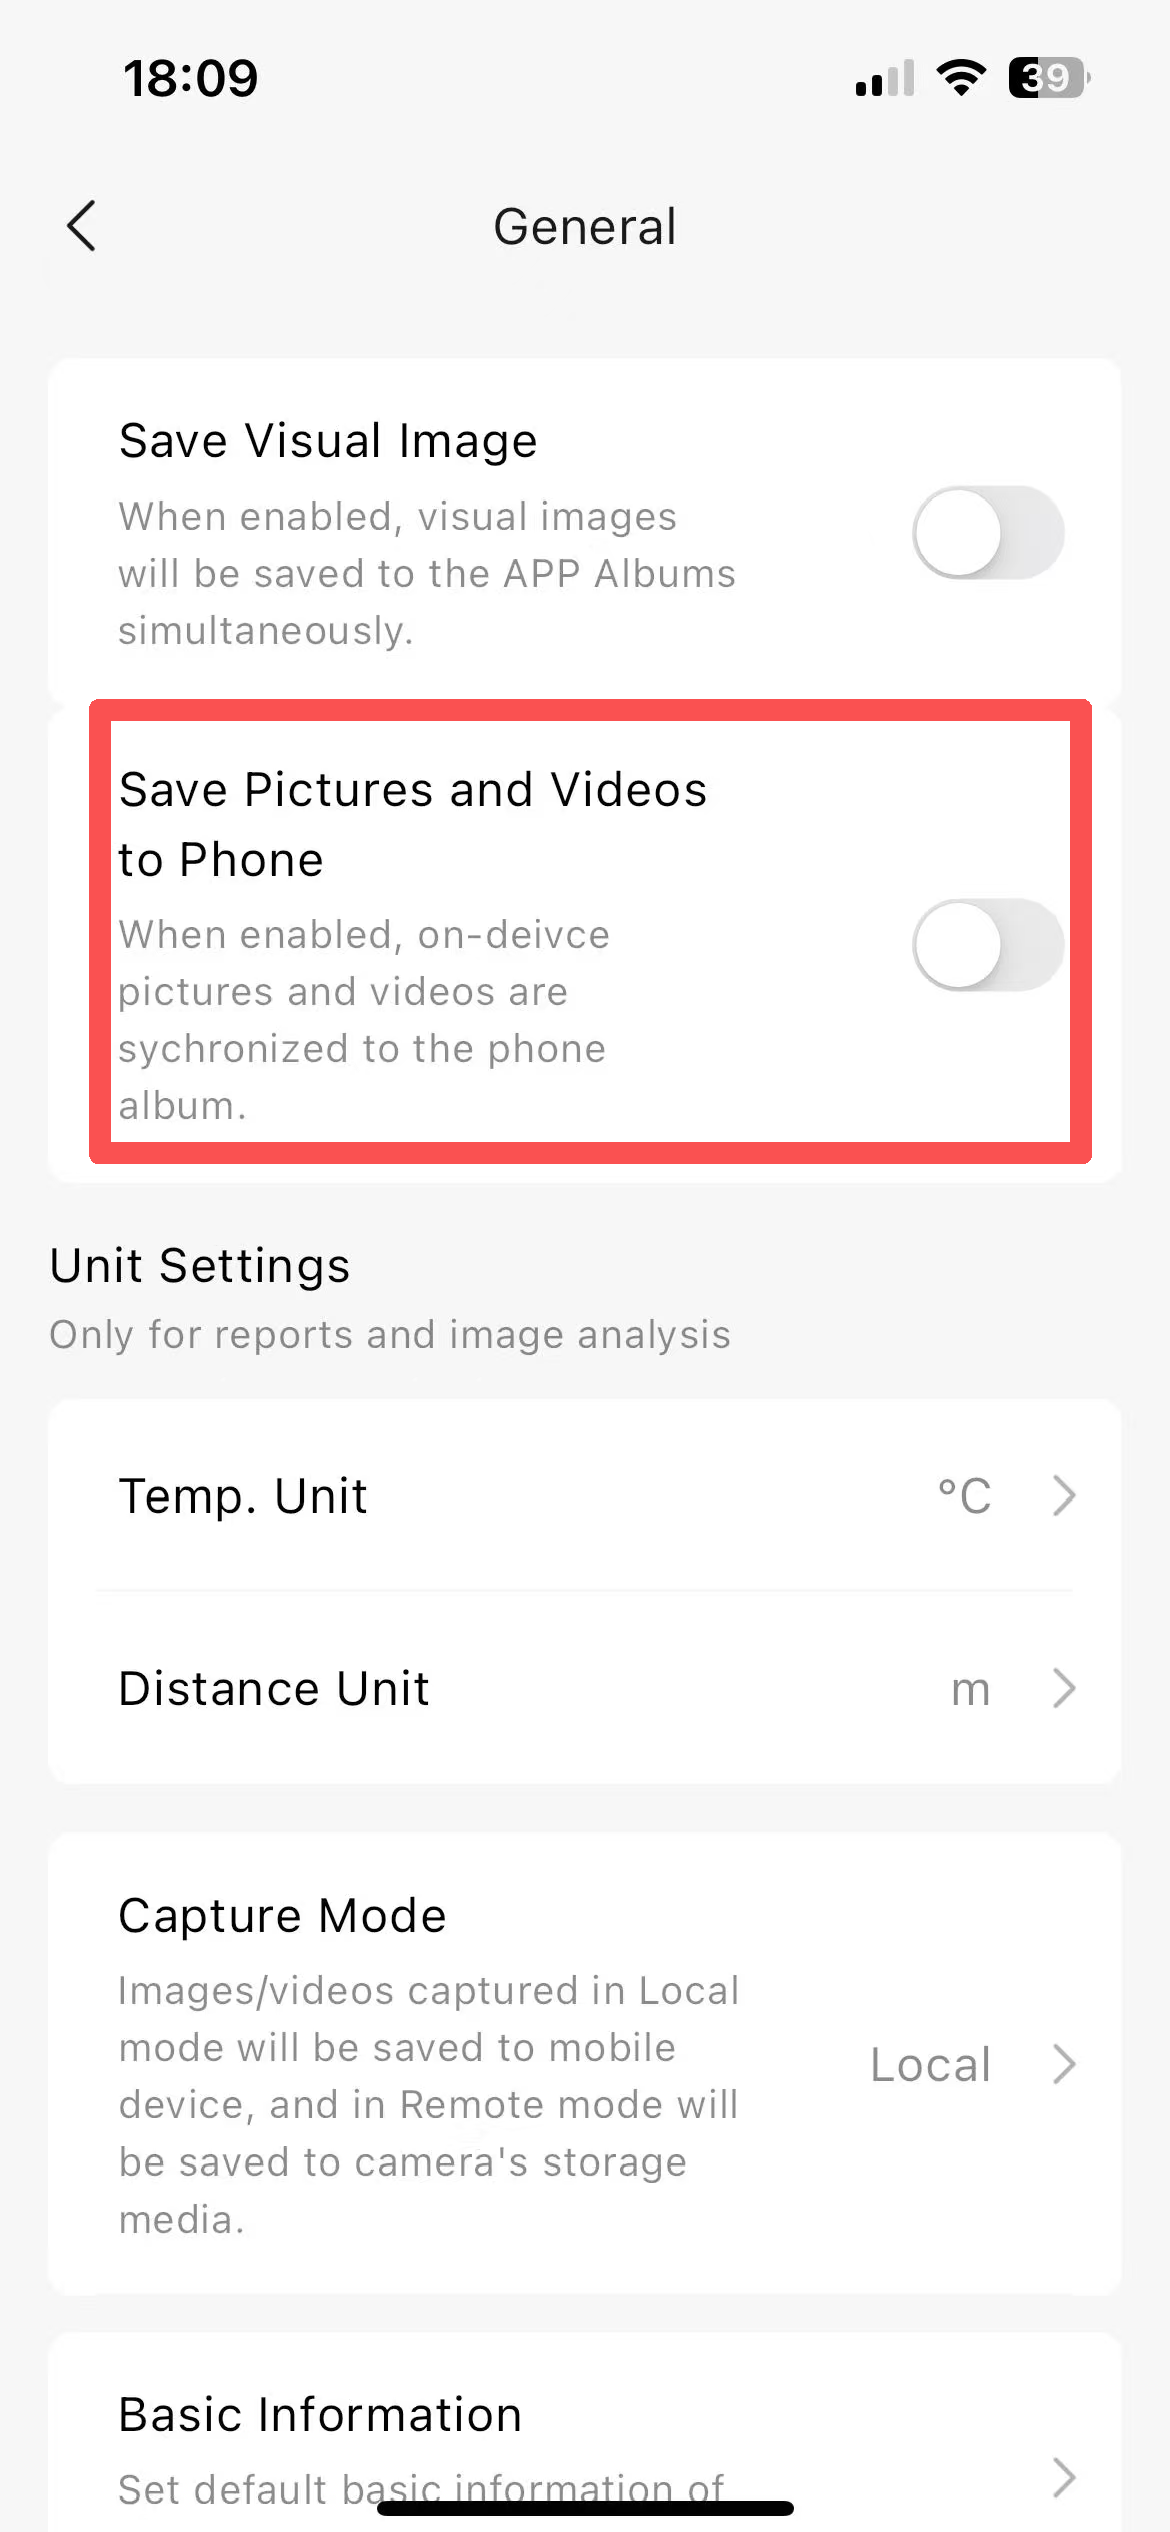
Step 4: Store and view photos after taking them
Default storage location: Images are saved in the app's internal gallery.
Sync to your phone album: To automatically save to your local album, go to: Settings → General → Save Pictures to Mobile Album to enable it.
How to view images/videos:
In the online preview interface, click the thumbnail in the lower left corner to view the newly shot image/video.
Click the album icon at the top right of the thumbnail to enter the full gallery.
Or on the app's main interface, tap the gallery to browse all the captured photos and videos.
Step 5: Image editing and report generation
Edit the image
Go to the gallery, select an image, and click the edit icon. You can:

Manually adjust the temperature value displayed at the measurement point/line/frame.
Switch between thermal imaging mode or visible light mode.
Adjust temperature range, false colors, parameters, etc.
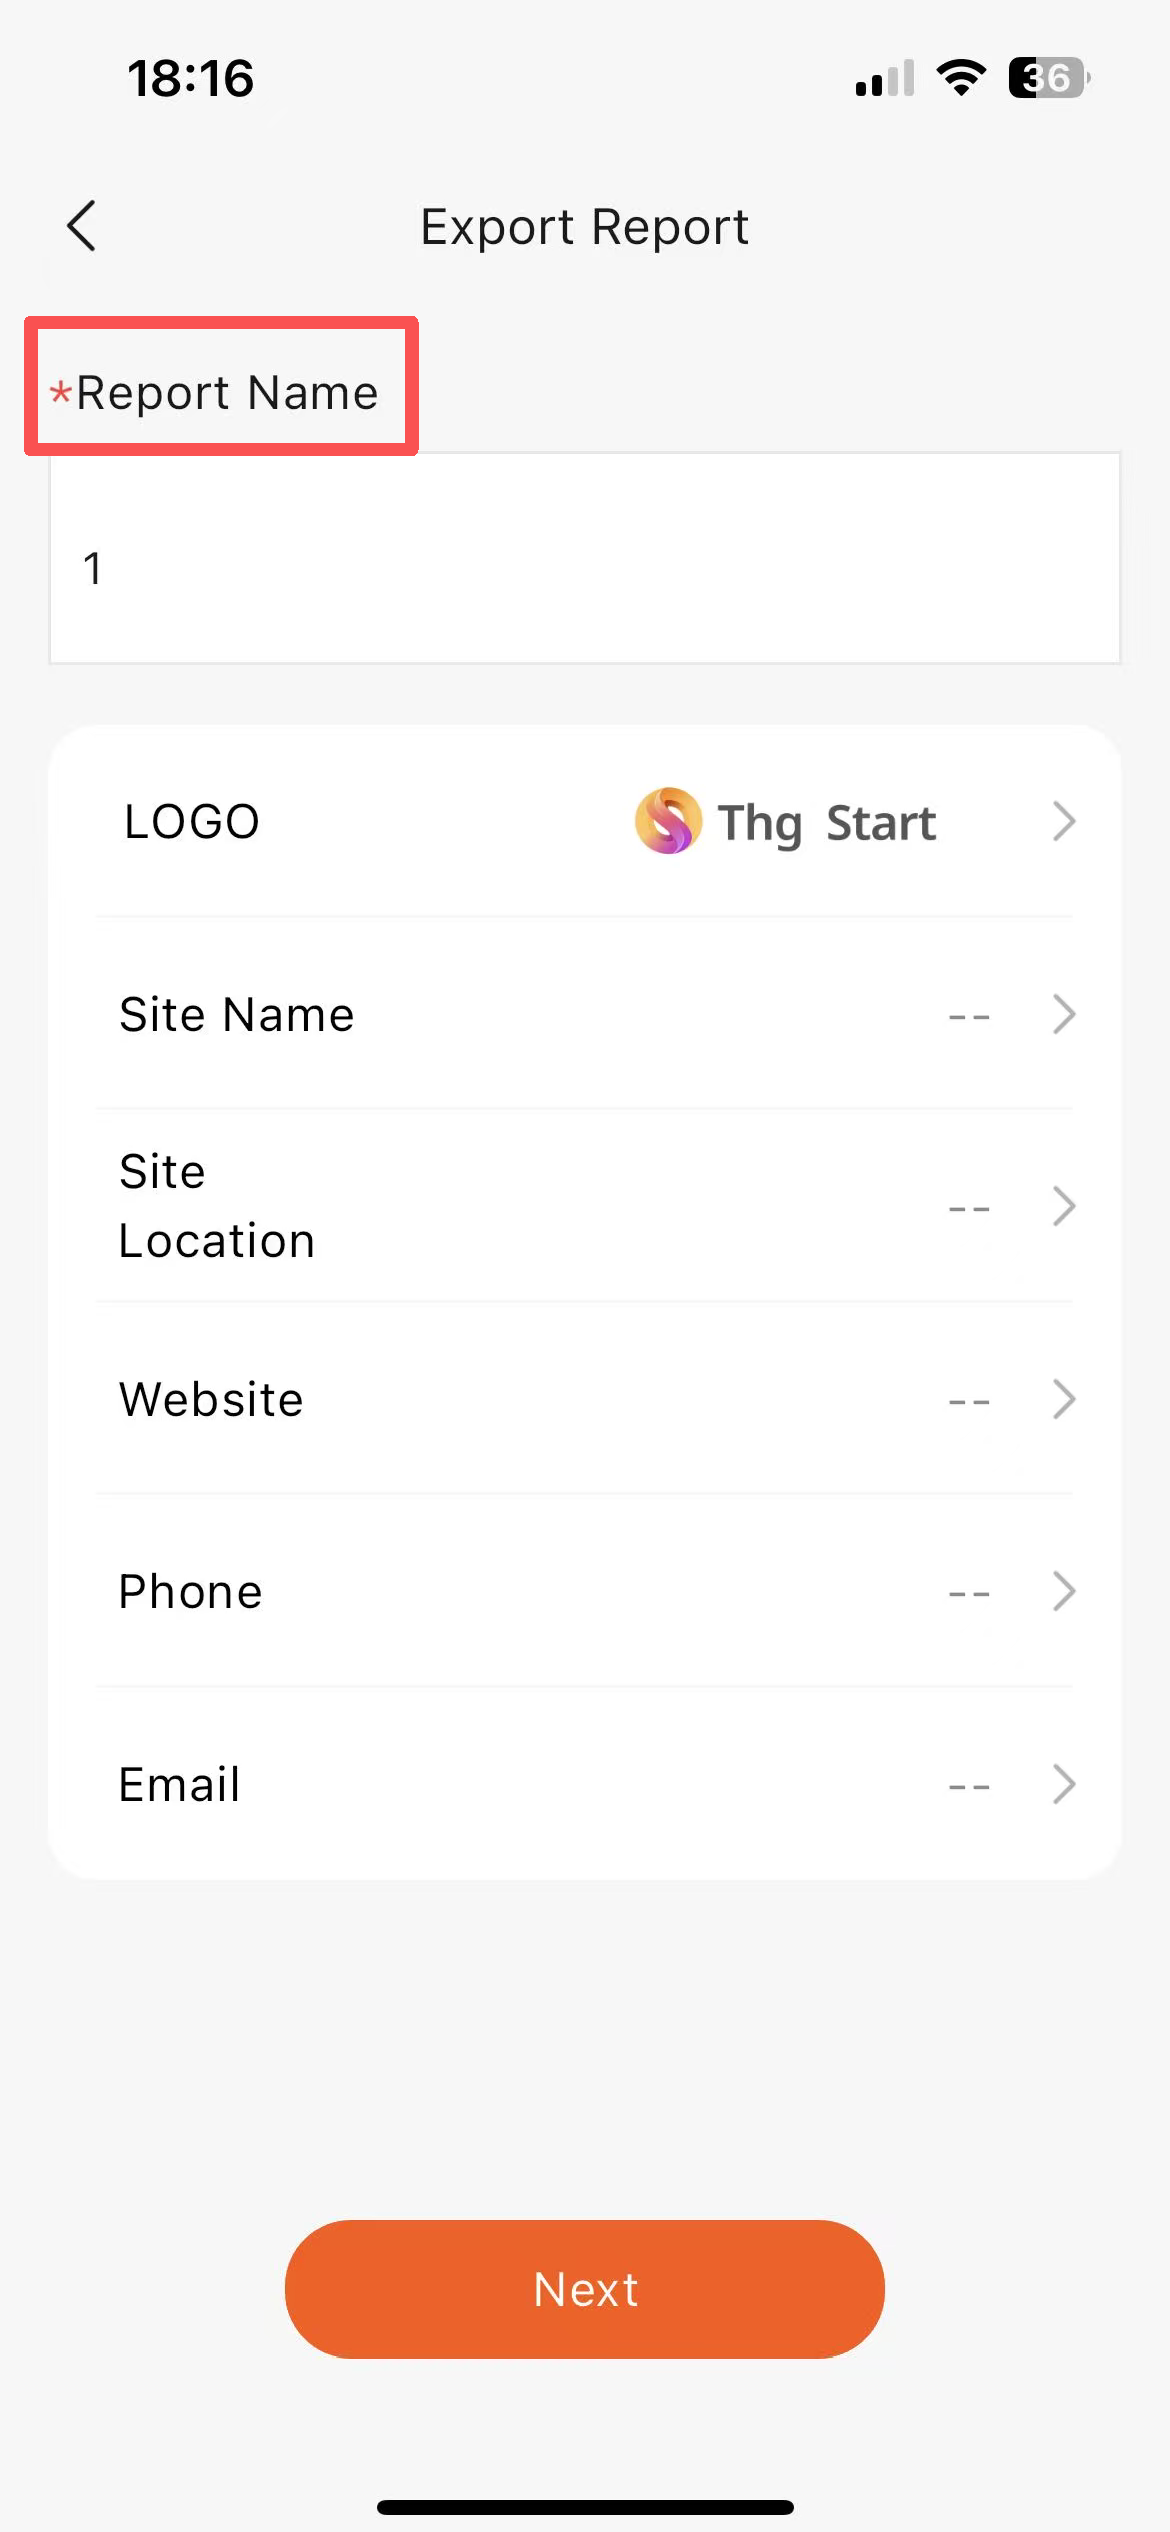
Generate Report (PDF)
Select the image from the gallery → Click the report icon → Fill in the report information (name required) → After confirmation, the PDF will be automatically generated → Click Share/Export.
Note: Video editing and report generation are not supported.
Additional notes
If the temperature alarm is enabled while taking photos, a high/low temperature flashing warning accompanied by vibration will appear below the preview screen, but this does not affect the photo.

The image capture process does not affect the normal temperature measurement and calibration of the thermal imager.
By following the above steps, you can easily use the thermal imager's photo function.